When troubleshooting a device that fails to power on, the first step is to check the power source. This may seem elementary, but many users overlook this crucial aspect. Begin by ensuring that the device is properly plugged into a functioning outlet.
It’s advisable to test the outlet with another device, such as a lamp or phone charger, to confirm that it is delivering power. If the outlet is operational, inspect the power cable for any visible signs of damage, such as fraying or kinks. A damaged cable can prevent the device from receiving adequate power, leading to startup issues.
In addition to checking the physical connections, consider the power settings of the device. Some devices have power-saving features that may inadvertently cause them to appear unresponsive. For instance, if a laptop is in sleep mode, it may not wake up immediately when the power button is pressed.
In such cases, holding down the power button for several seconds can force a restart. If the device still does not respond, it may be time to explore other troubleshooting methods.
Key Takeaways
- Ensure the power source is connected and working properly before troubleshooting any issues with your device.
- Reset the System Management Controller (SMC) to resolve power-related problems and improve overall performance.
- Regularly check the battery health and charging status to prevent unexpected shutdowns and maximize battery lifespan.
- Verify the display functionality by adjusting brightness, checking for dead pixels, and ensuring proper connection to the device.
- Test the charger with different power outlets and devices to rule out any issues with the charging cable or adapter.
- Check for hardware issues such as loose connections, damaged ports, or overheating components that may affect the device’s performance.
- Run diagnostics to identify and address any underlying software or hardware issues affecting the device’s functionality.
- Seek professional help from authorized service providers or technicians for complex hardware repairs or persistent technical issues.
Resetting the SMC
Understanding the SMC
The SMC manages various power functions, including sleep and wake operations, battery management, and thermal management.
Resetting the SMC on MacBooks with Removable Batteries
To reset the SMC on a MacBook with a removable battery, follow these steps:
* Shut down the device and disconnect it from any power source.
* Remove the battery and press and hold the power button for five seconds.
* Reinsert the battery, reconnect the power adapter, and turn on the device.
Resetting the SMC on MacBooks with Non-Removable Batteries
For MacBooks with non-removable batteries, the process is slightly different:
* Shut down the device and connect it to a power source.
* Press and hold the Shift + Control + Option keys on the left side of the built-in keyboard while simultaneously pressing the power button.
* Hold these keys for ten seconds before releasing them and then pressing the power button again to turn on the MacBook.
This reset can often resolve issues related to devices that fail to charge properly or are unresponsive.
Checking the Battery

A malfunctioning battery can be a primary culprit when a device fails to power on. For laptops and mobile devices, checking the battery’s health is essential. Many operating systems provide built-in tools to assess battery status.
For instance, on macOS, users can hold down the Option key and click on the Apple menu to access “System Information.” Under “Power,” users can find detailed information about their battery’s condition, cycle count, and charge capacity. A battery that shows signs of wear or has a high cycle count may need replacement. In addition to software diagnostics, physical inspection of the battery is also important.
Look for any swelling or deformation in the battery casing, which can indicate a serious issue that requires immediate attention. If a battery appears swollen, it should not be used further as it poses safety risks, including potential fire hazards. In such cases, removing the battery (if possible) and seeking a replacement is advisable.
Verifying the Display
| Display Metric | Value |
|---|---|
| Resolution | 1920 x 1080 pixels |
| Refresh Rate | 60 Hz |
| Color Accuracy | Delta E < 2 |
| Brightness | 300 nits |
Sometimes, a device may be powered on but fail to display anything on the screen. This can lead users to believe that their device is completely unresponsive when, in fact, it is functioning normally but simply not displaying output. To verify this, listen for any sounds that indicate activity, such as startup chimes or fan noises.
If these sounds are present but no display appears, it’s time to investigate display-related issues. One common issue is a faulty connection between the display and the motherboard. For laptops, gently adjusting the screen angle can sometimes restore visibility if there’s a loose connection.
Additionally, connecting an external monitor can help determine if the problem lies with the internal display or if it’s a broader issue with the device itself. If an external monitor works while the internal display does not, it may indicate a need for repair or replacement of the laptop’s screen or display components.
Testing the Charger
A malfunctioning charger can often be mistaken for a dead device. To ensure that your charger is working correctly, start by inspecting it for any visible damage or wear. Look for frayed cables or bent connectors that could impede charging functionality.
If possible, test the charger with another compatible device to see if it charges successfully. This will help determine whether the issue lies with the charger itself or with the device being charged. If you have access to another charger that is compatible with your device, try using it to see if it resolves the issue.
Sometimes chargers can fail without any visible signs of damage; therefore, testing with an alternative charger can provide clarity. Additionally, ensure that any charging ports on both the charger and device are clean and free from debris that could obstruct proper connection.
Checking for Hardware Issues

Hardware issues can manifest in various ways and may prevent a device from powering on or functioning correctly. Common hardware problems include faulty RAM, damaged motherboards, or issues with internal components like hard drives or graphics cards. If all previous troubleshooting steps have failed, it may be time to delve deeper into potential hardware malfunctions.
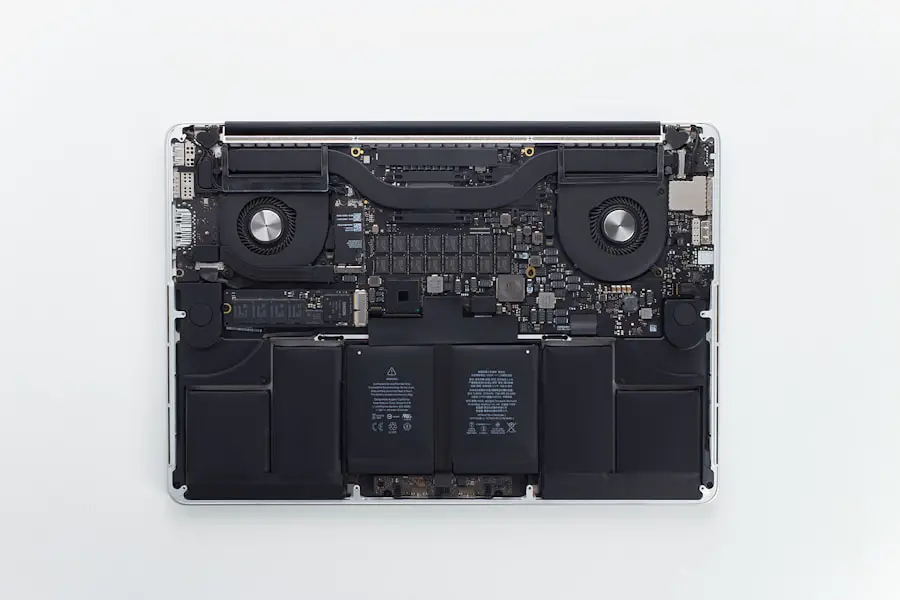
For laptops and desktops, reseating RAM modules can sometimes resolve boot issues caused by poor connections. This involves removing and reinserting RAM sticks into their slots to ensure they are securely connected. Additionally, if you are comfortable doing so, opening up your device to check for loose connections or damaged components can provide insight into underlying problems.
However, this should only be attempted by those familiar with hardware repairs, as improper handling can lead to further damage.
Running Diagnostics
Many modern devices come equipped with built-in diagnostic tools designed to help users identify issues quickly and efficiently. For instance, Apple devices have a feature called Apple Diagnostics that can be accessed by holding down the D key while starting up the computer. This tool runs a series of tests on various hardware components and provides error codes that can help pinpoint specific problems.
Similarly, Windows PCs often include diagnostic utilities accessible through advanced startup options or recovery environments. These tools can check for hardware failures and provide insights into potential software conflicts that may be preventing startup. Running these diagnostics can save time and effort by narrowing down potential causes of failure and guiding users toward appropriate solutions.
Seeking Professional Help
If all troubleshooting efforts have been exhausted without success, seeking professional help may be necessary. Authorized service centers or certified technicians possess specialized knowledge and tools that can diagnose and repair complex issues that are beyond typical user capabilities. They can perform comprehensive assessments of both hardware and software components to identify problems accurately.
When seeking professional assistance, it’s essential to choose reputable service providers who are experienced with your specific type of device. Researching customer reviews and asking for recommendations can help ensure you receive quality service. Additionally, inquire about warranty coverage or repair guarantees before proceeding with any repairs to protect your investment and ensure peace of mind during the process.
FAQs
What are some common reasons why a MacBook may not turn on?
Some common reasons why a MacBook may not turn on include a drained battery, a faulty power adapter, a malfunctioning power button, or a hardware issue.
How can I troubleshoot a MacBook that is not turning on?
You can troubleshoot a MacBook that is not turning on by checking the power source, resetting the SMC (System Management Controller), performing a PRAM/NVRAM reset, and seeking professional assistance if necessary.
What should I do if my MacBook’s battery is drained and it won’t turn on?
If your MacBook’s battery is drained and it won’t turn on, try connecting it to a power source and letting it charge for at least 30 minutes before attempting to turn it on again.
Is there a way to determine if the power adapter is the issue when my MacBook won’t turn on?
You can determine if the power adapter is the issue when your MacBook won’t turn on by trying a different power outlet, using a different power adapter, or testing the power adapter with another device to see if it is functioning properly.
When should I seek professional assistance for my MacBook that won’t turn on?
You should seek professional assistance for your MacBook that won’t turn on if you have tried troubleshooting steps and the issue persists, if you suspect a hardware problem, or if your MacBook is still under warranty.
